
PLATFORM: Windows, Mac and iOS
SOFTWARE: Unreal Engine 4
LANGUAGES: C++
Ricochet Revolt is a single player, first person shooter, currently in development.
I was responsible for all aspects of the game, except the 3D models and textures (Synty). This includes system design, level design, UI, programming, story and world building.
CORE MECHANICS
Propel yourself rapidly through low gravity using the recoil and ricochet of your riot cannon.

Use the ricochet to blast yourself up to higher decks of the ship.

In combat use your recoil to take the high ground. Jump up and shoot down to end up floating above your enemies, as you rain down fire.

Fight enemies by bouncing projectiles around corners in narrow corridors.
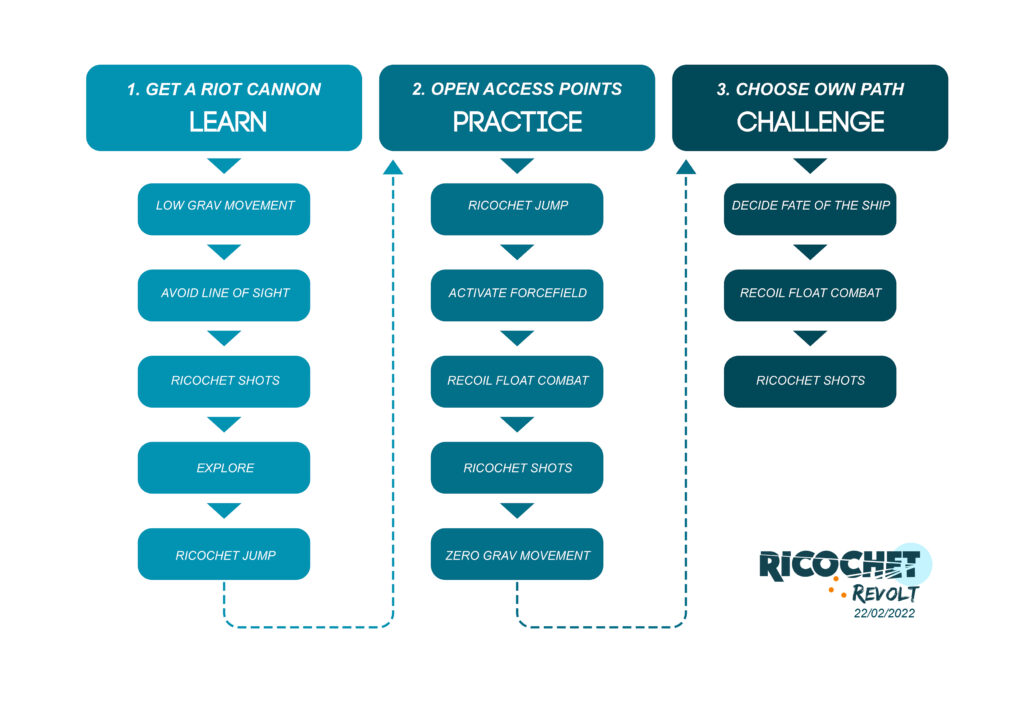
LEVEL DESIGN OVERVIEW
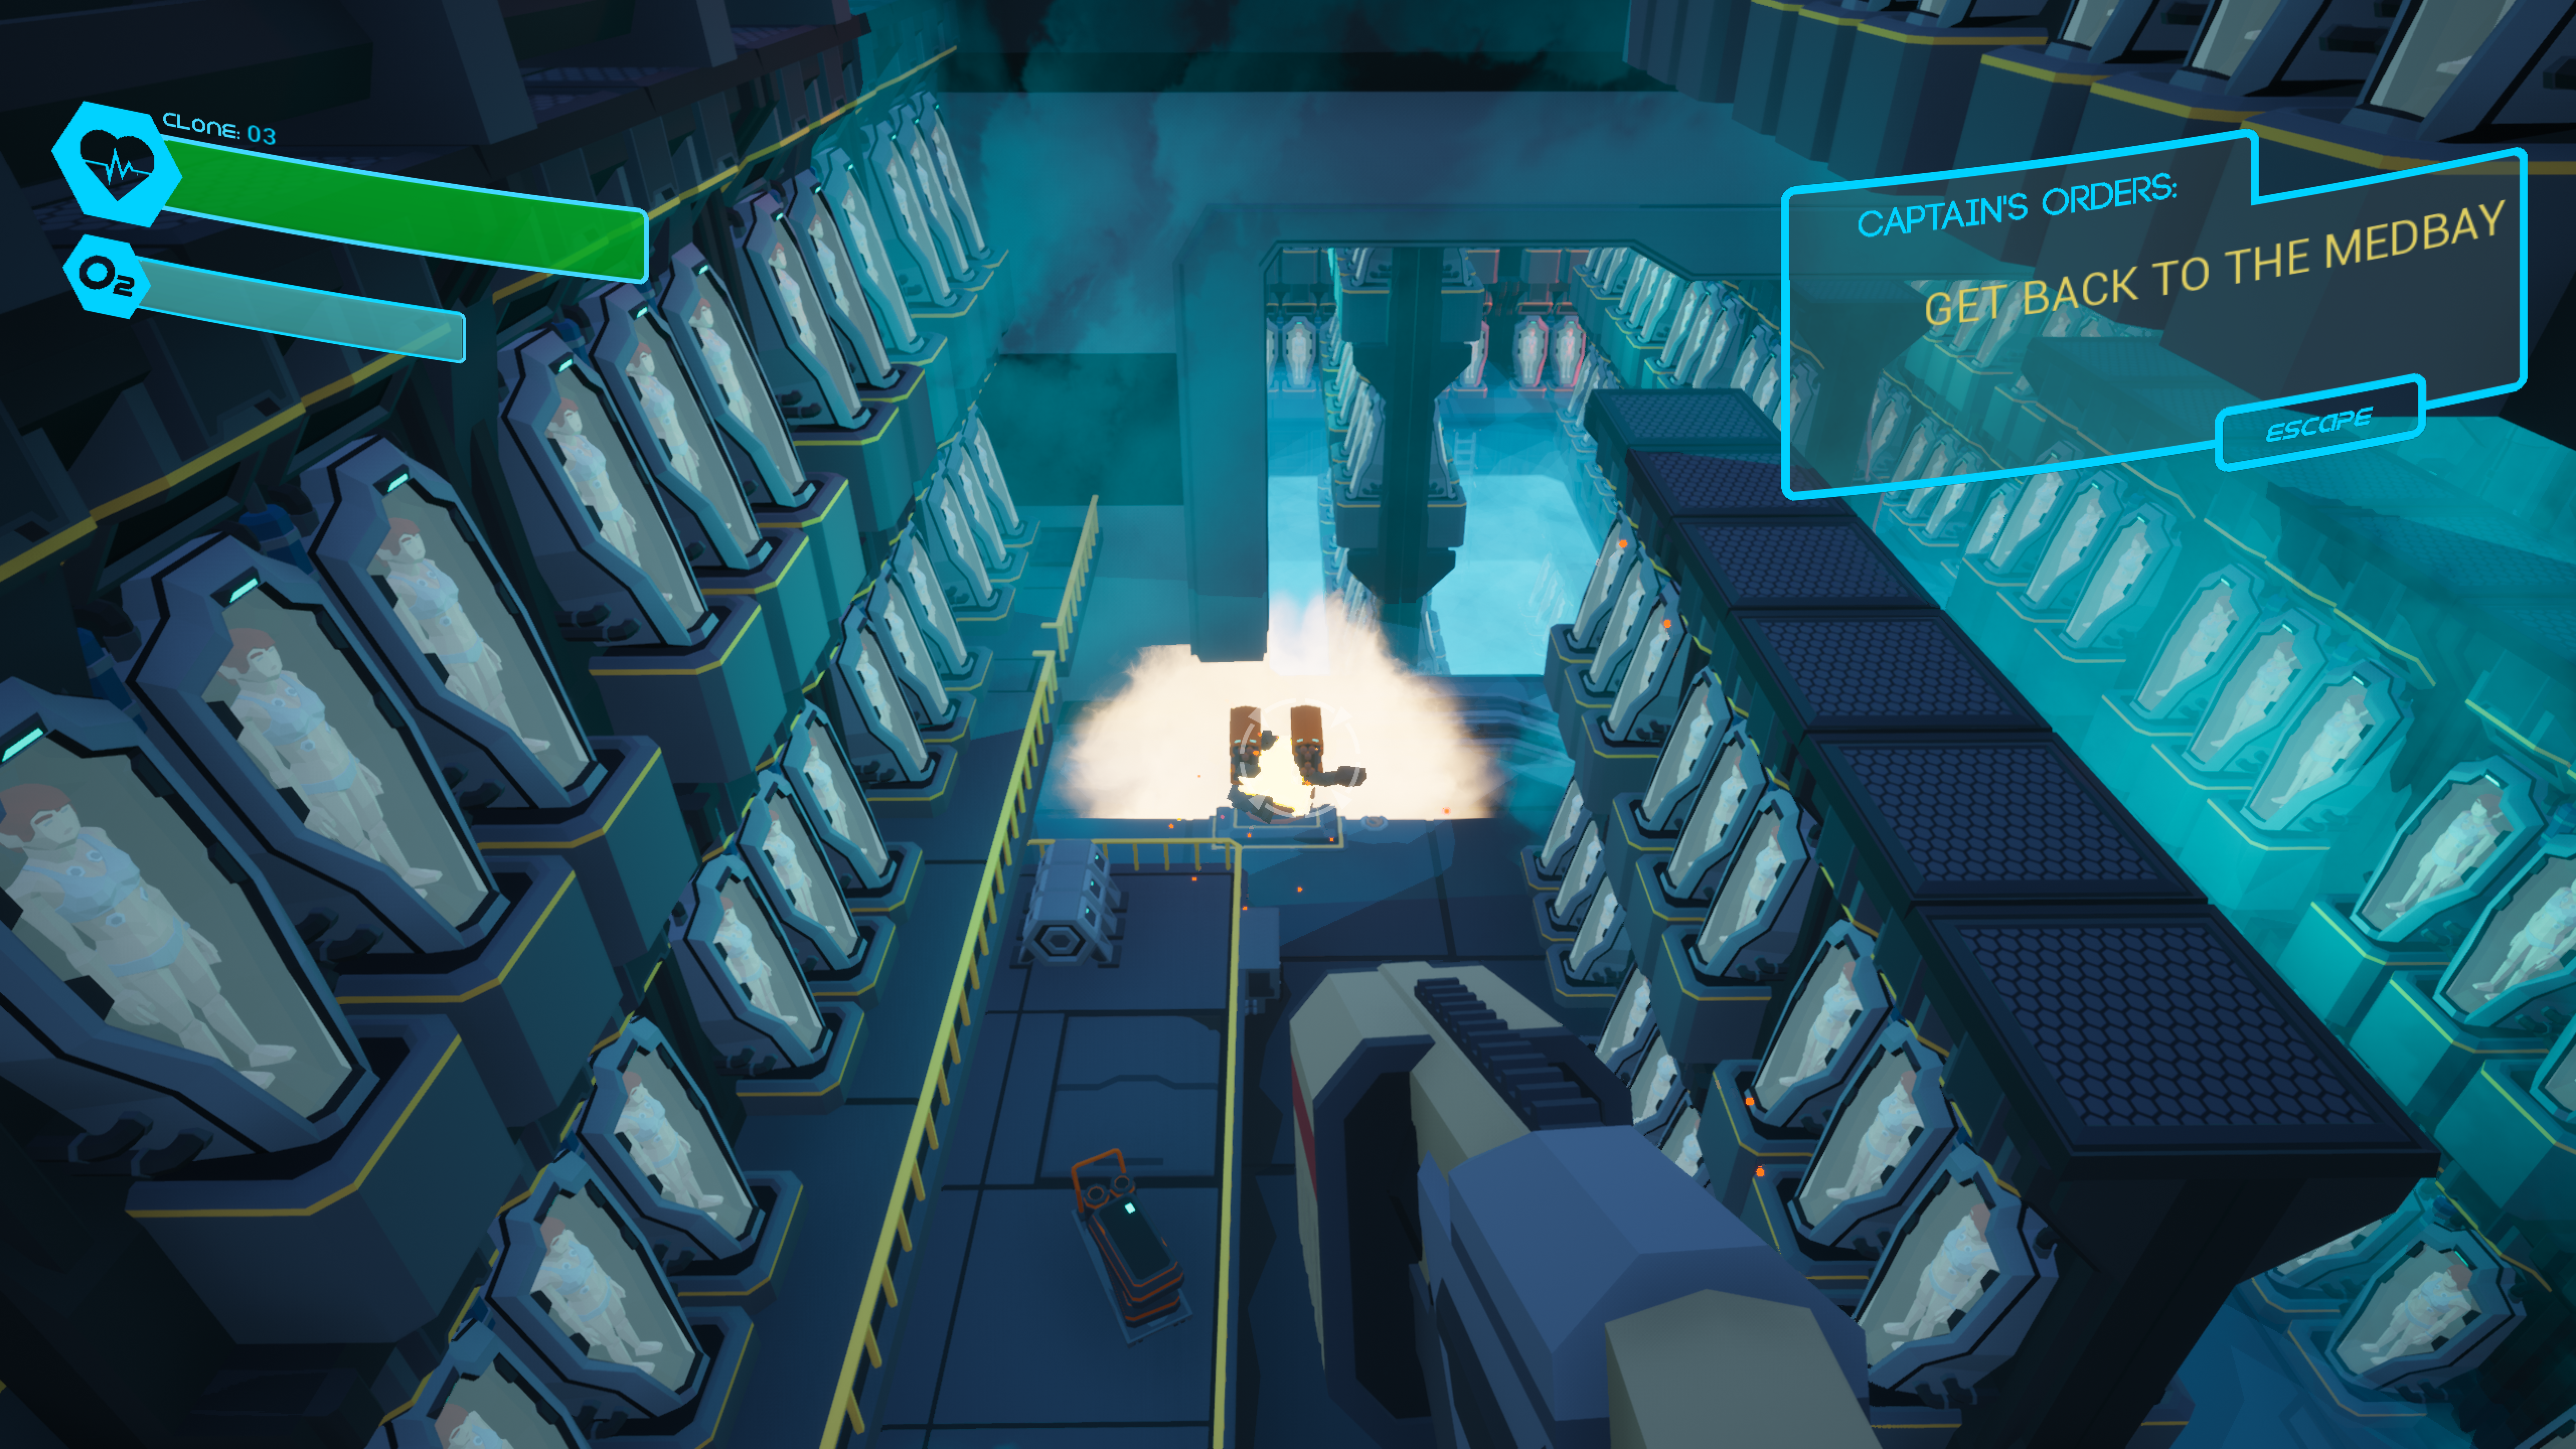
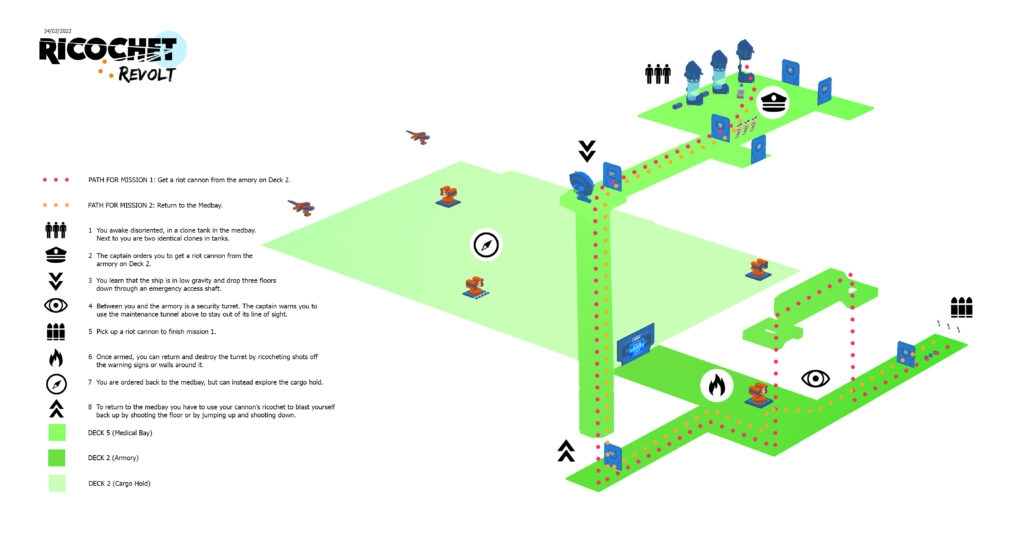
You awake disoriented, in a clone tank in the medbay. Next to you are two identical clones in tanks (these will be your re-spawn bodies). The captain (a head in a jar) orders you to get a riot cannon from the armory.
- Primary Objective 1: Get a riot cannon from the armory on Deck 2.
Mission 1: You learn that the ship is in low gravity and you must drop three floors down through an emergency access shaft.
Teaching Point: How to move in low gravity.
Mission 2: Between you and the armory is a security turret. The captain warns you, via comms, to stay out of its line of sight. You can jump up into a maintenance tunnel above.
Teaching Point: Stealth is sight based.
Mission 3: Once armed, you can return and destroy the turret by ricocheting shots off the warning signs or walls around it.
Teaching Point: Projectiles can be bounced around corners.
Side Quest 1: You are ordered back to the Medbay, but can instead explore the cargo hold that the turret was guarding. Inside you find hundreds of clones identical to you and you have an early opportunity to practice your combat skills against turrets and drones. You will also hear a garbled message pointing out that the captain does not want you to know what the cargo is.
Teaching Point: You do not have to follow orders.
Mission 4: To return to the medbay you have to use your cannon’s ricochet to blast yourself back up by shooting the floor or by jumping up and shooting down, using the cannon’s recoil to drive you upwards.
Teaching Point: The recoil or ricochet of your weapon can allow you to access higher areas.
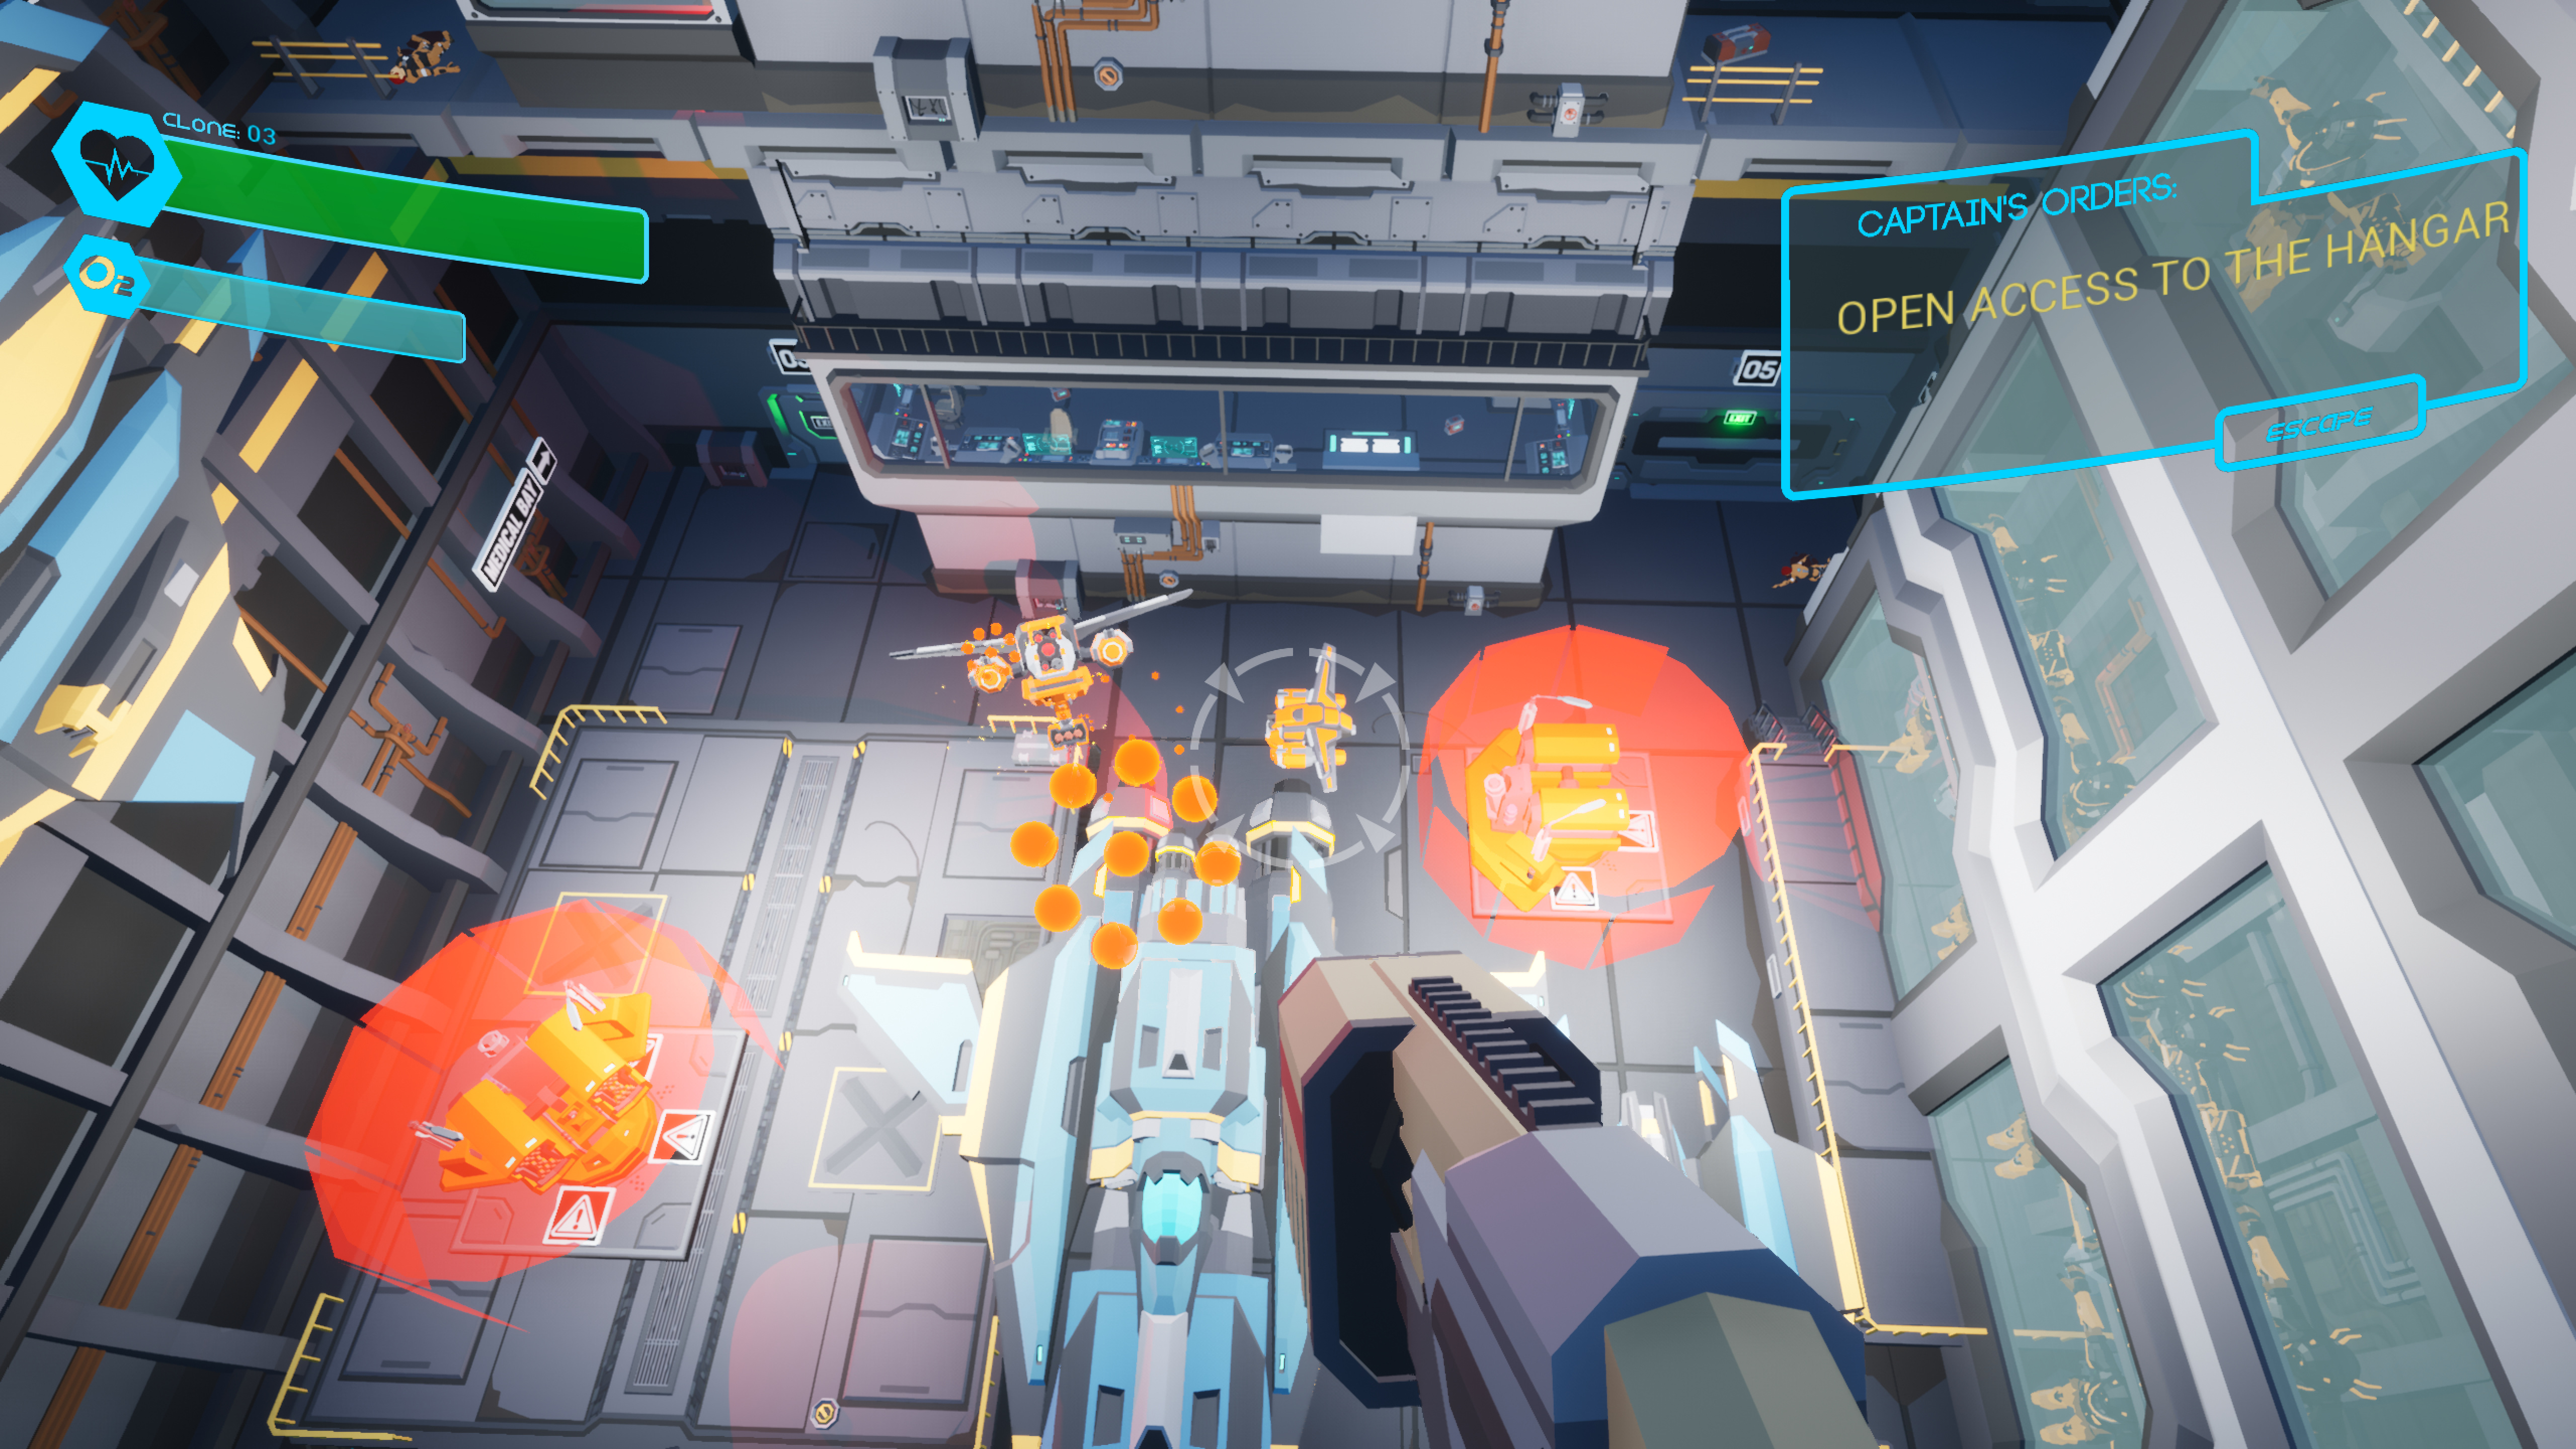
- Primary Objective 2: Unlock the door between the medbay and the hangar.
Mission 5: When you get back, the captain informs you that the crew is infected and they have taken over the ship. Your task is to open the sealed door to the hangar, so that he can activate security droids to retake the bridge. Now that you are armed you can use the cannon to get up the next emergency access shaft.
Practice Point: Use your weapon to access higher areas.
Mission 6: A massive turret is guarding your entry point to the hangar bay. The captain will tell you that you can activate the forcefield in front of it, to deflect it’s shots back on itself.
Teaching Point: Shoot forcefield control panels to activate them.
Mission 7: As you enter the hangar on the second level up, you will be confronted by the sight of several turrets and drones and the captain will warn you to jump to take the high ground. If you do you’ll find yourself floating above your targets as the recoil from your shots drives you upwards.
Teaching Point: Jump up and shoot down to take the high ground in combat.
- Primary Objective 3: Unlock the door leading to the bridge.
Mission 8: On opening the door between the hangar and the medbay the captain will order you to find the airlock on deck 6 to begin your final task.
Practice Point: Explore and use your weapon to access higher areas.
Mission 9: To get to the airlock you will have to fight through several turrets and in the process explore the crew quarters, which are essentially cramped lockable cells. You will also see several corpses of clones identical to you.
Practice Point: Activate forcefields and bounce projectiles around corners.
Side Quest 2: You can explore the captain’s quarters and the Hydroponics section for more clues. A crew radio message will compare the luxury of the captain’s quarters to the crew cells. You can also find the locked door to the bridge.
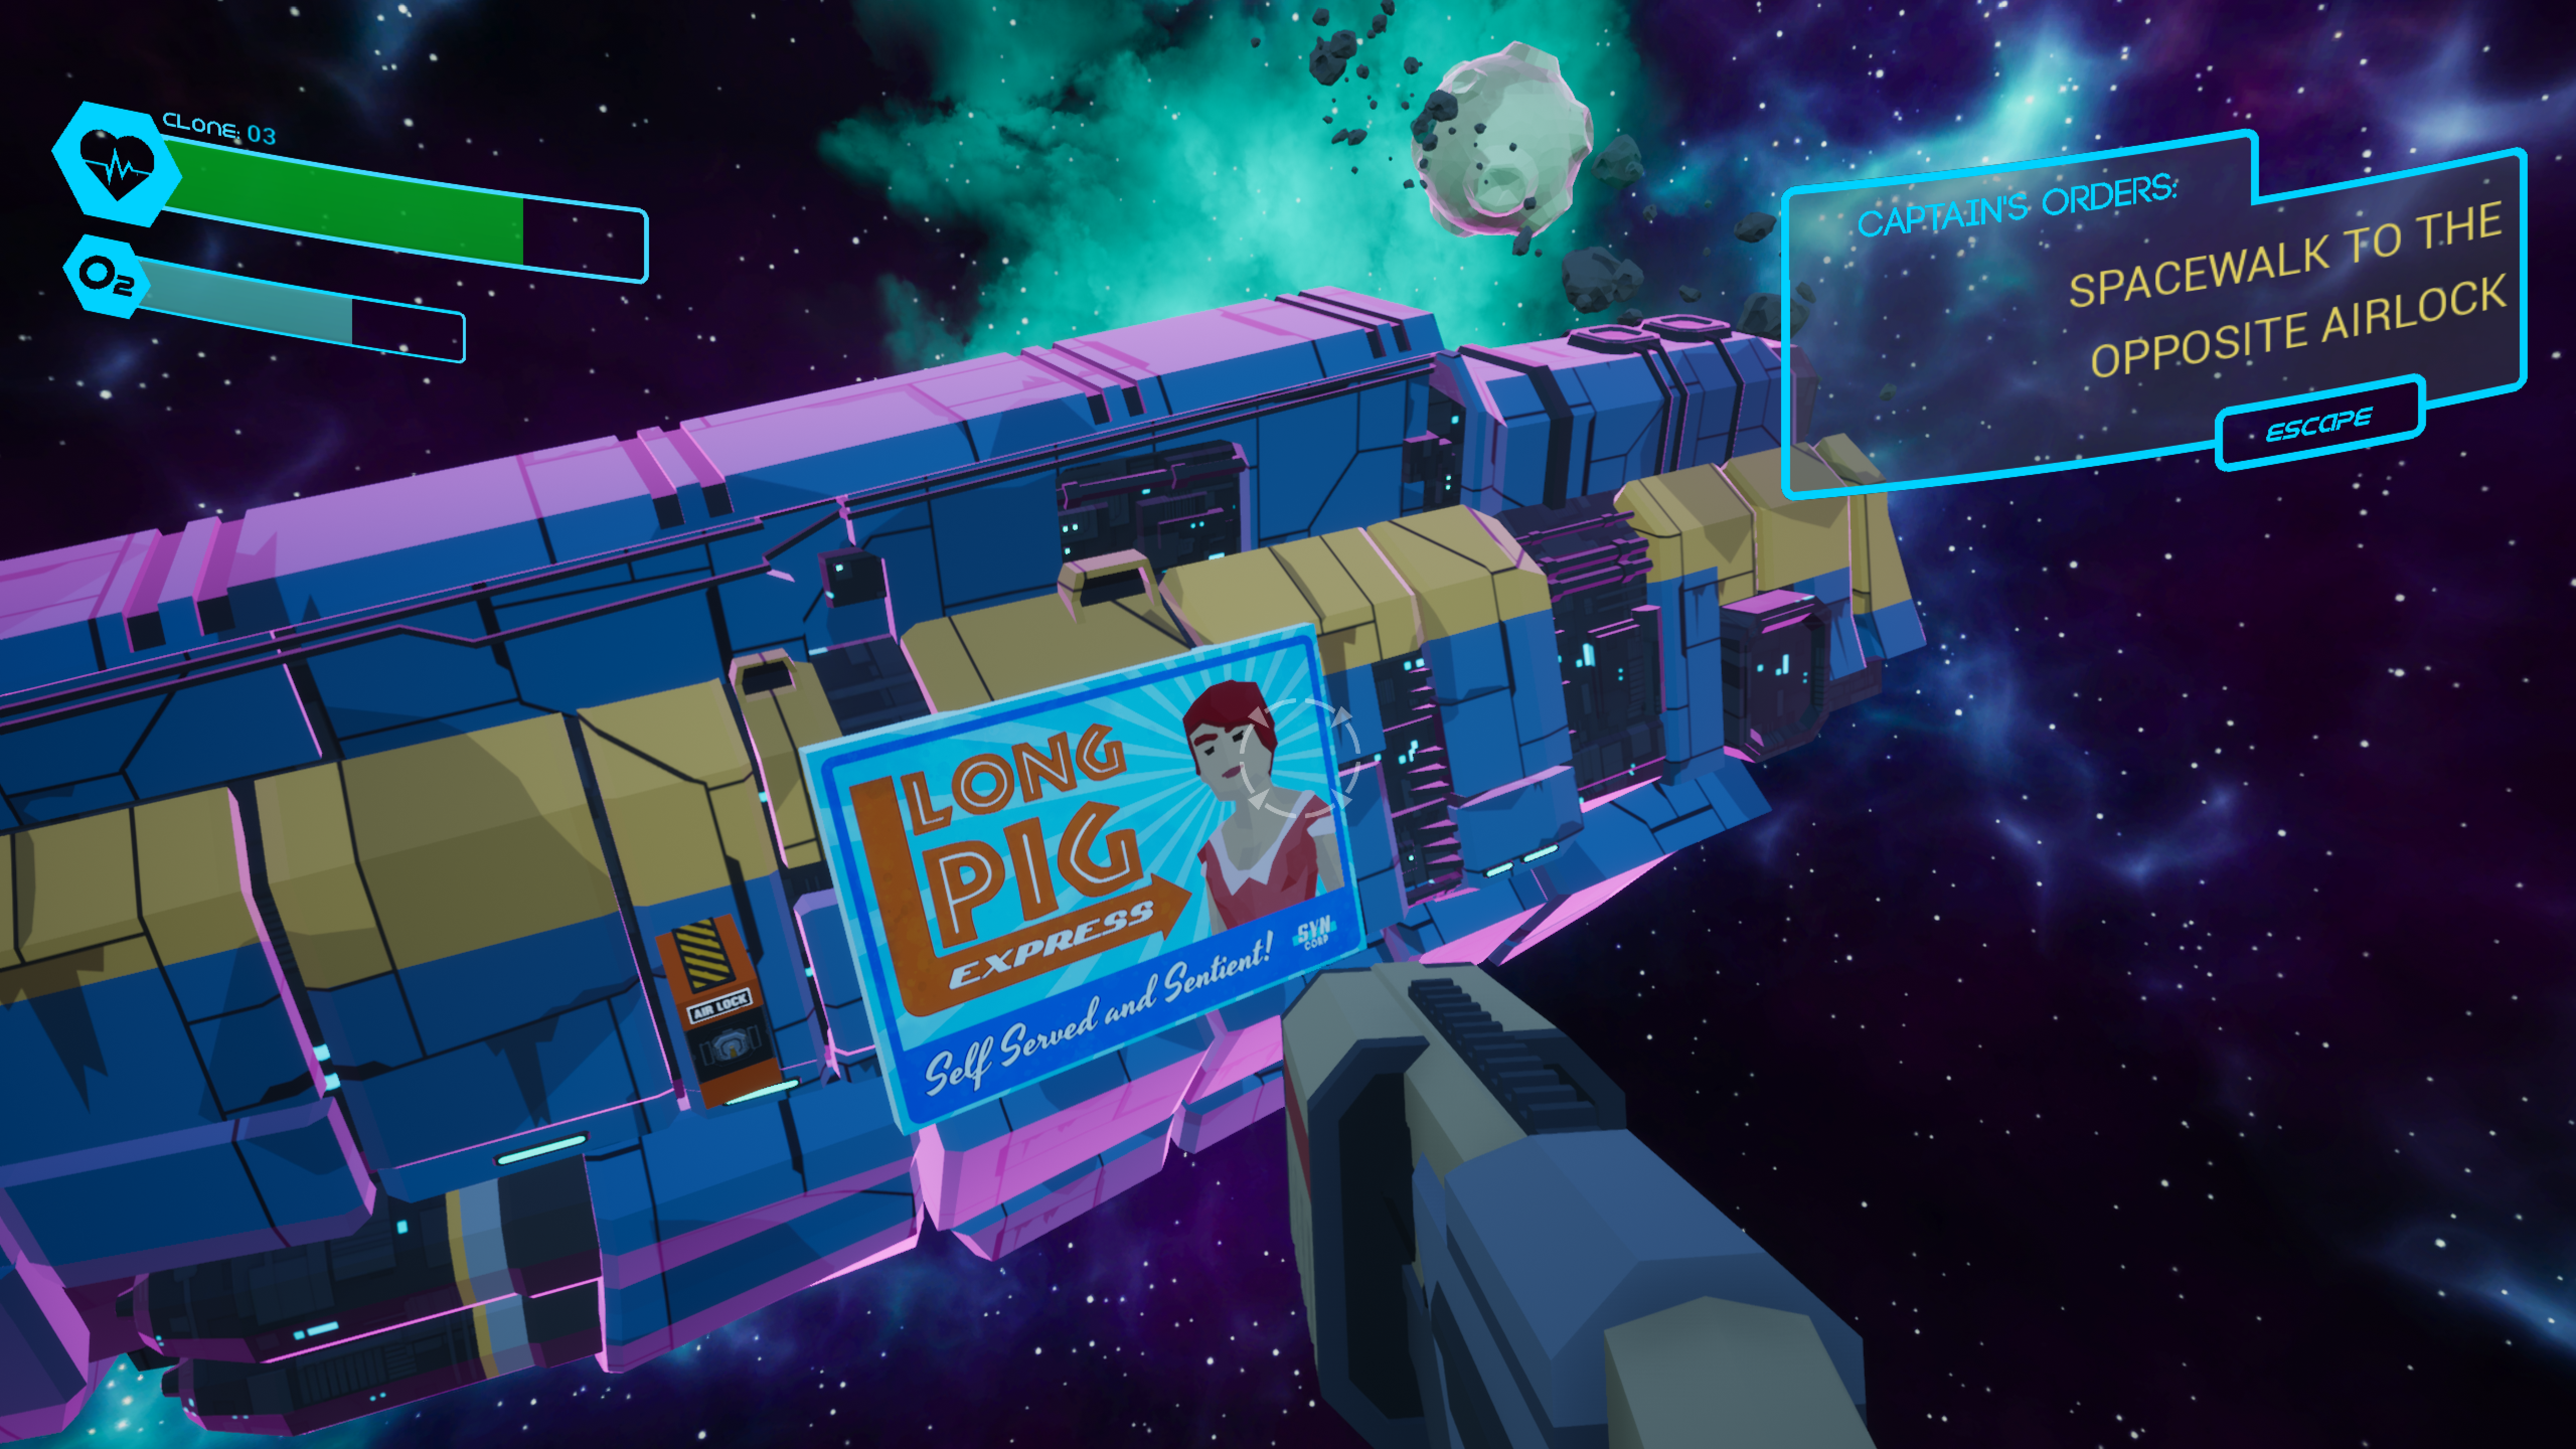
Mission 10: At the airlock you will be prompted to suit up . After leaving the ship the captain will instruct you to use your weapon to aid steering in zero gravity. You will have to travel over the ship to enter the next airlock. In the process you will see the ship logo, which reads: LONG PIG EXPRESS, Self Served and Sentient.
Teaching Point: Shoot to steer in space.
Mission 11: On reentering the ship, the captain will warn you that he will be unable to communicate and that you should shoot any member of the crew on sight.
At this point you will discover the truth about the Ship, the Captain and the Crew.
- Primary Objective 4: Decide whether to side with the crew or the captain, or forge your own path.